Okapi
Examples
Basics
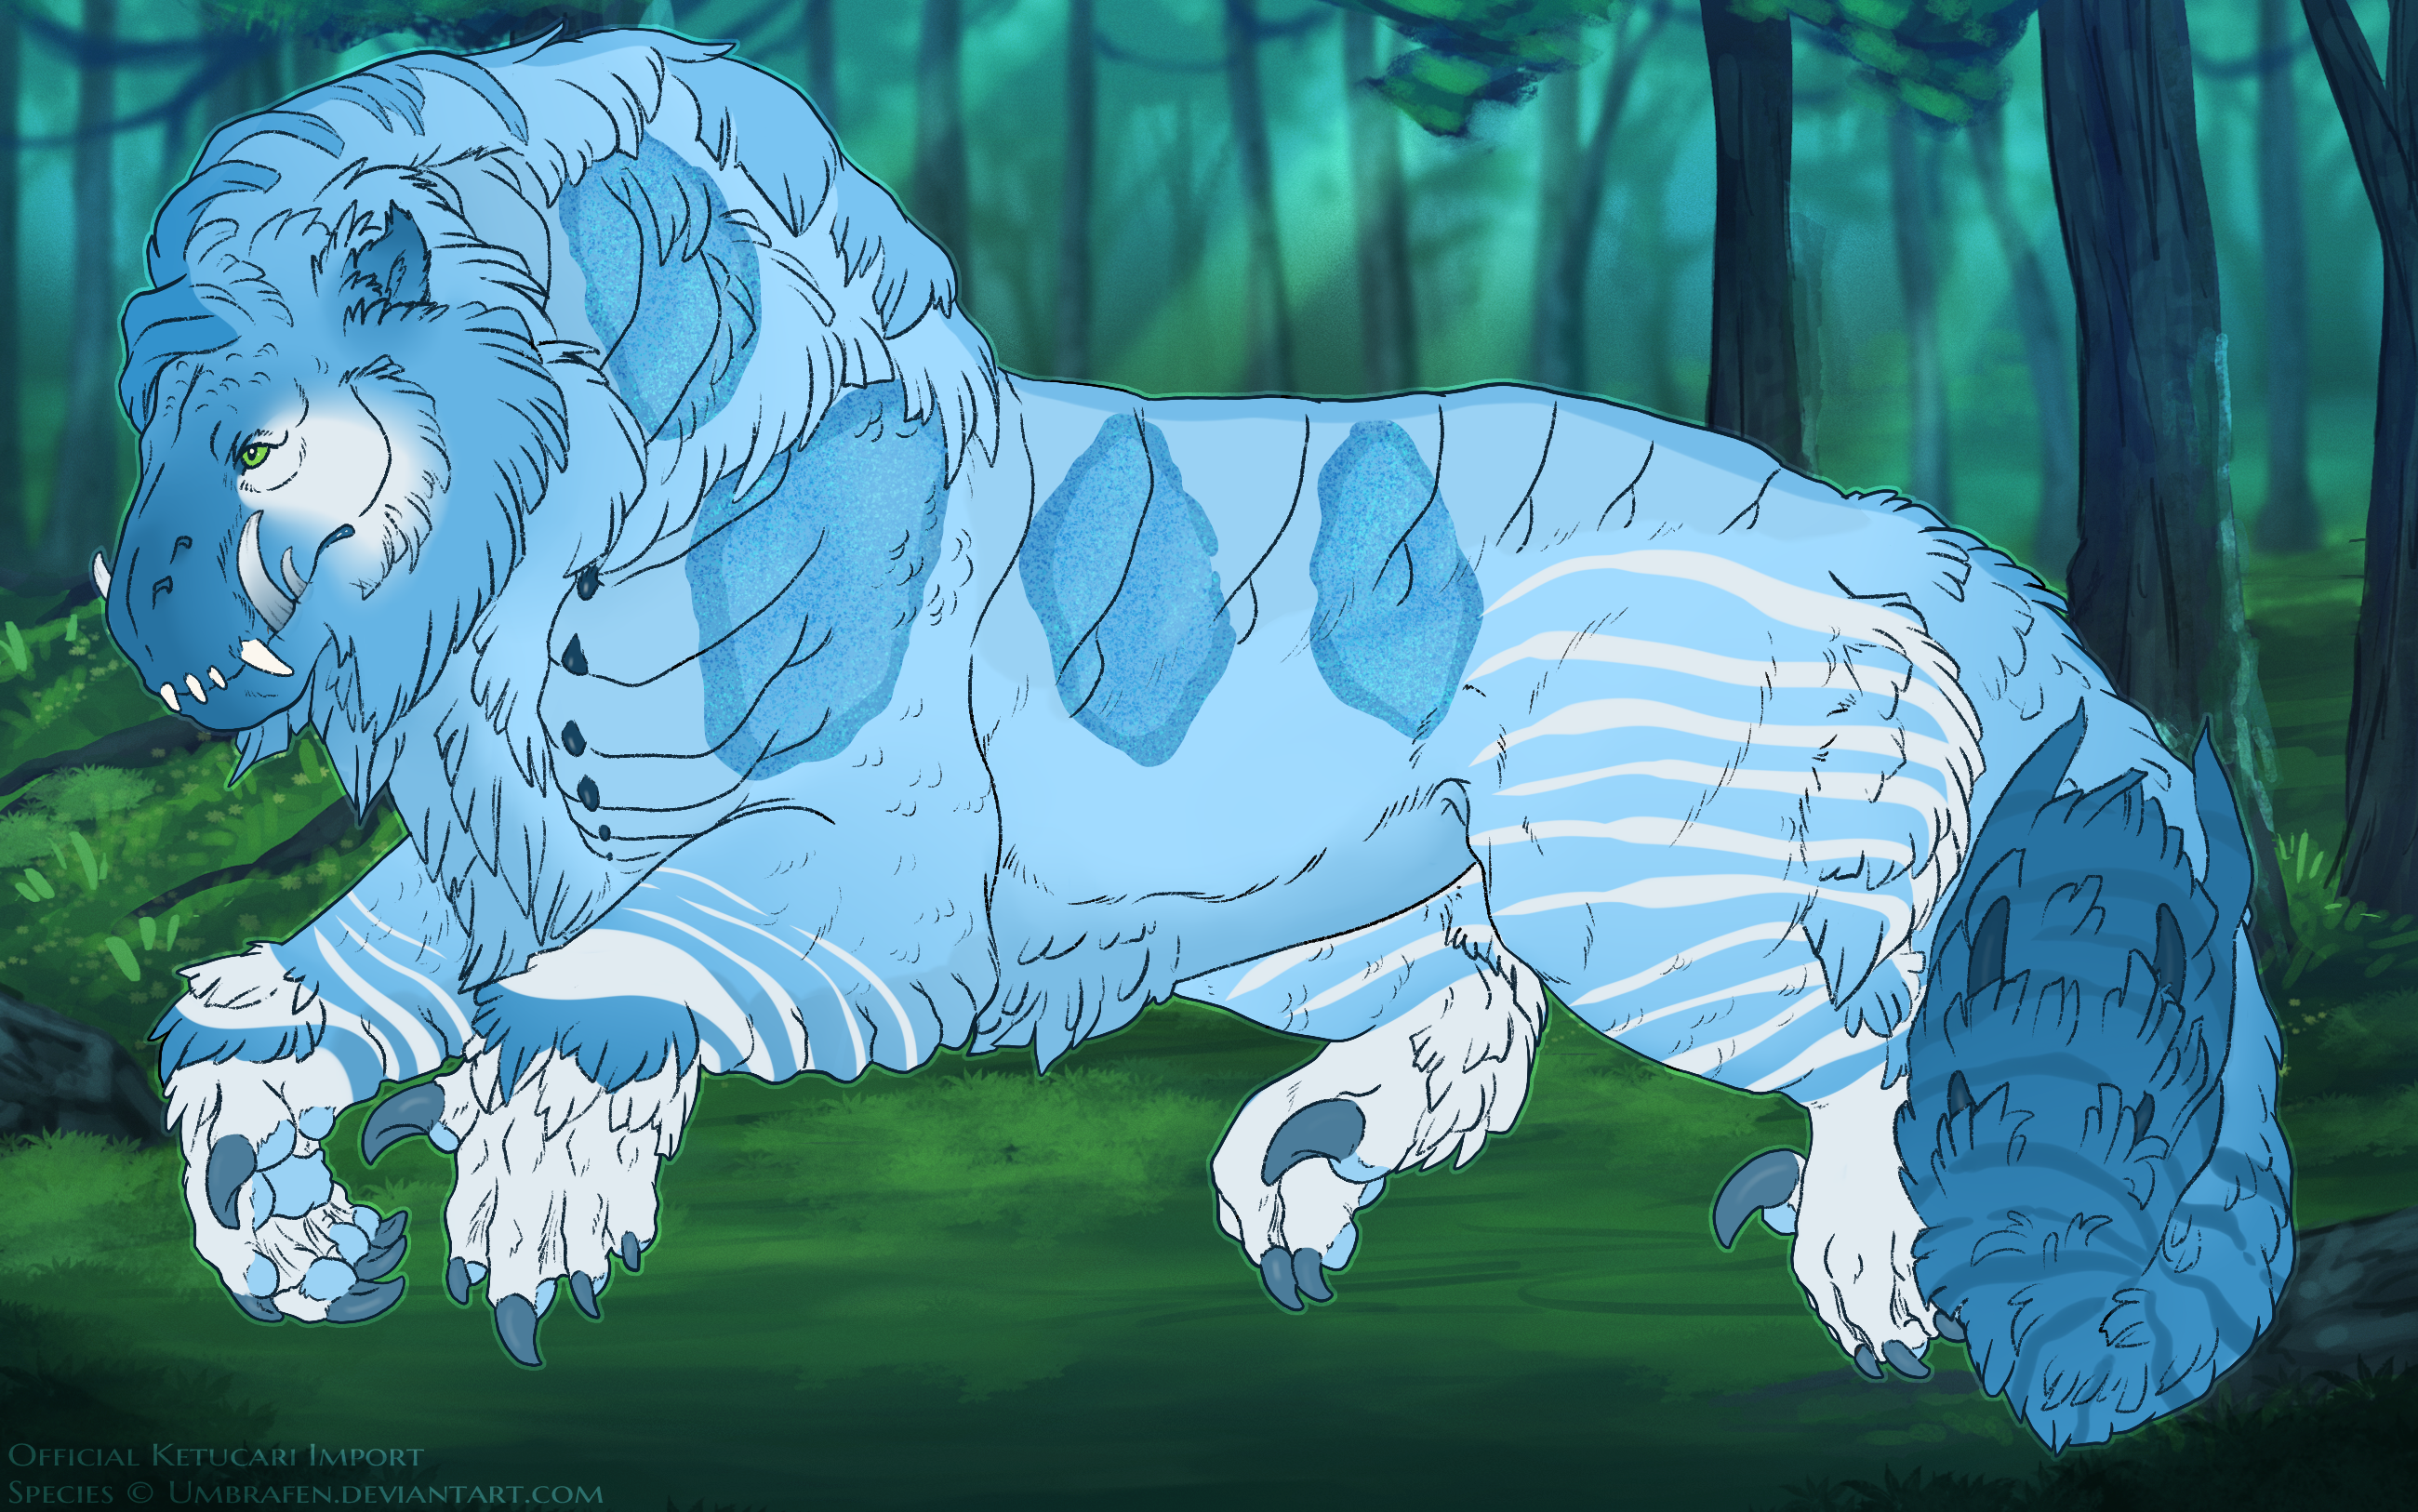
 Okapi creates a mixture of stripes and blocks of white to mimic the white markings found in real life Okapi In your ketucari's genotype, okapi is denoted by the letters "nOkp" (heterozygous) or "OkpOkp" (homozygous). In its heterozygous form, okapi has a pass rate of 35%. Homozygous okapi has a 60% pass rate.
Color and Shape
Okapi must always be white
Okapi creates stripes that reach horizontally from the back of the limb tapering towards the front of the limb, and a spot/mask on the face. The face spot must be touching the eye somewhere. There may be large blocks of white lower down on the leg. The facial spot may be hard edged, soft, blended, or a mixed edge. Stripes may be thick, thin, or a mixture of the two.
Okapi stripes are allowed to follow the contours of the body, and feather/fur texture, as long as the direction of the stripes is horizontal on the affected body part.
Range
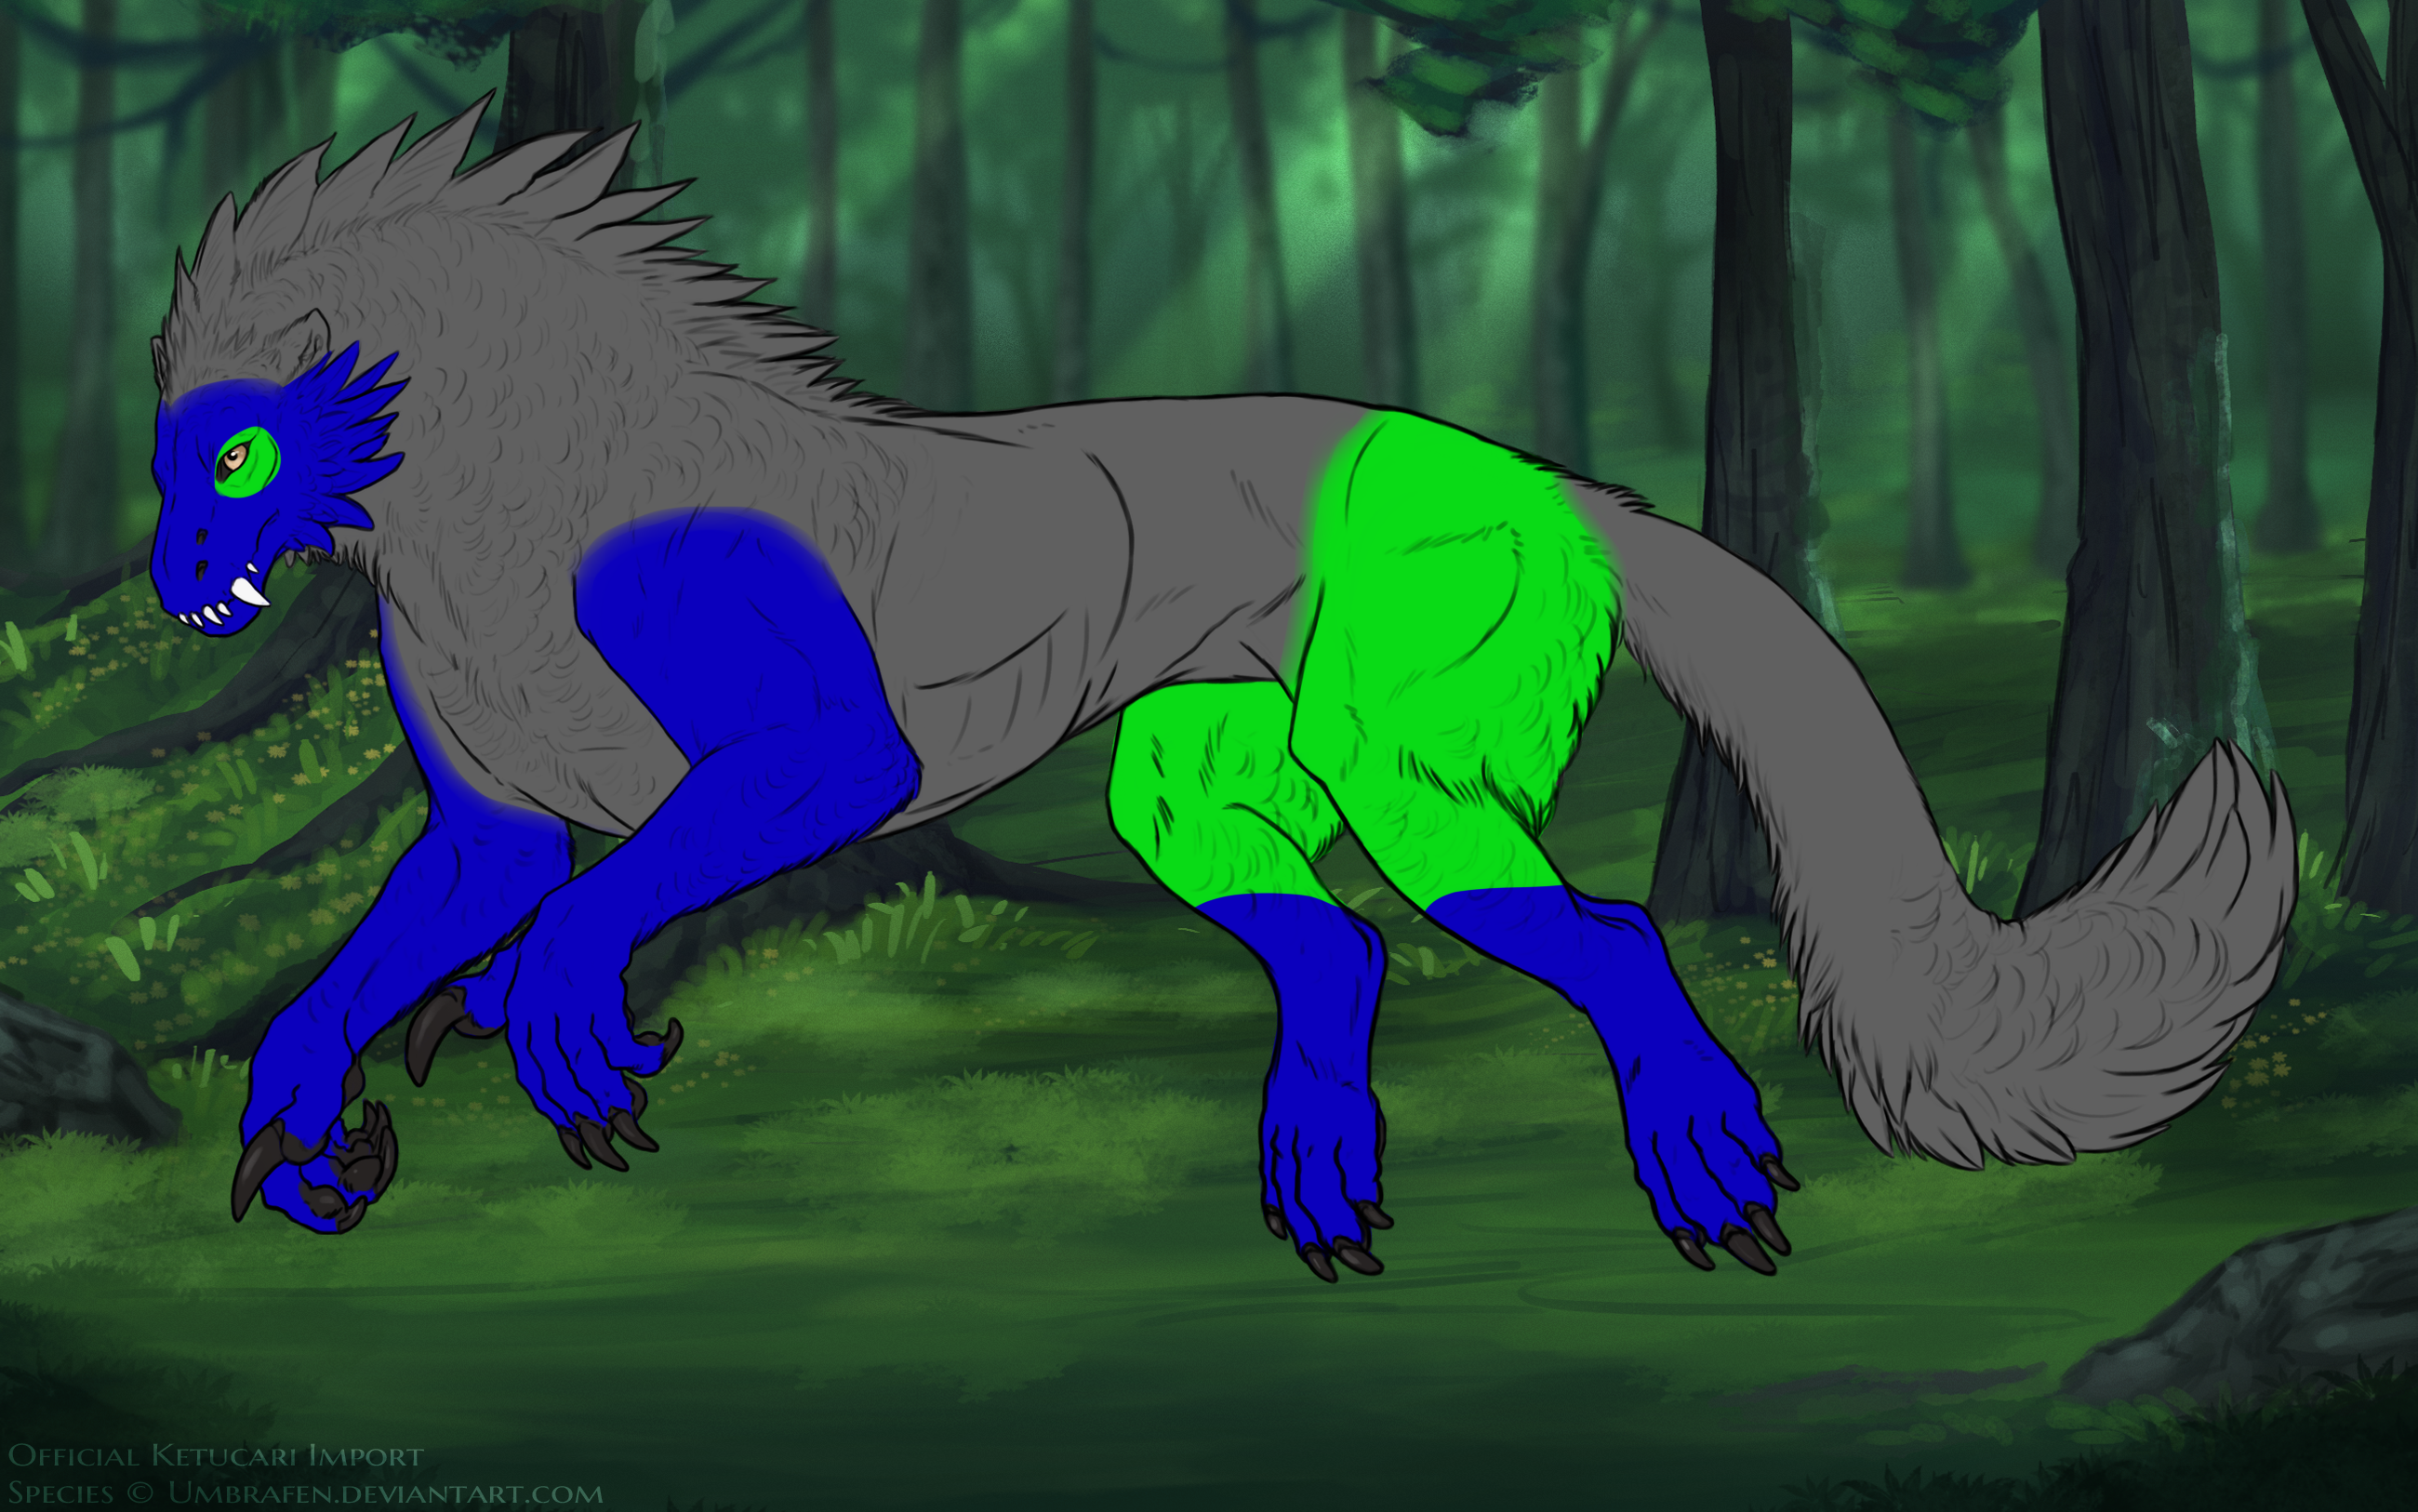
Okapi must always be present at minimum on the hind legs and the face. Blue is the maximum area okpai can be present in. The green on the hindleg shows where Okapi striping must be present at minimum. Stripes don't have to reach from one side to the other, but must be easily spotted. The green on the face is the minimum size of the facial spot/mask, however it doesn't have to be that exact shape or placement as long as it touches the eye visibly.
Interaction with Other Markings
• Okapi displays over all other markings.
Accents
Here are some small accents you can add to your designs to make them more unique!
• Okapi stripes may optionally "connect" on the back of the leg/thigh, and this may be hard edged or blended.
• The facial spot may be hard edged, soft, blended, or a mixed edge. Both options are shown on Glaecalum below, with the face mask being a mixed edge.
• Okapi allows for large blocks of white that can start from the toes. On the hindleg this block can go uninterupted up to the "heel". On the forelimbs this may go up halfway up the arm.
• The stripes may partially fade into the base coat on the front edge by no more than 50%.